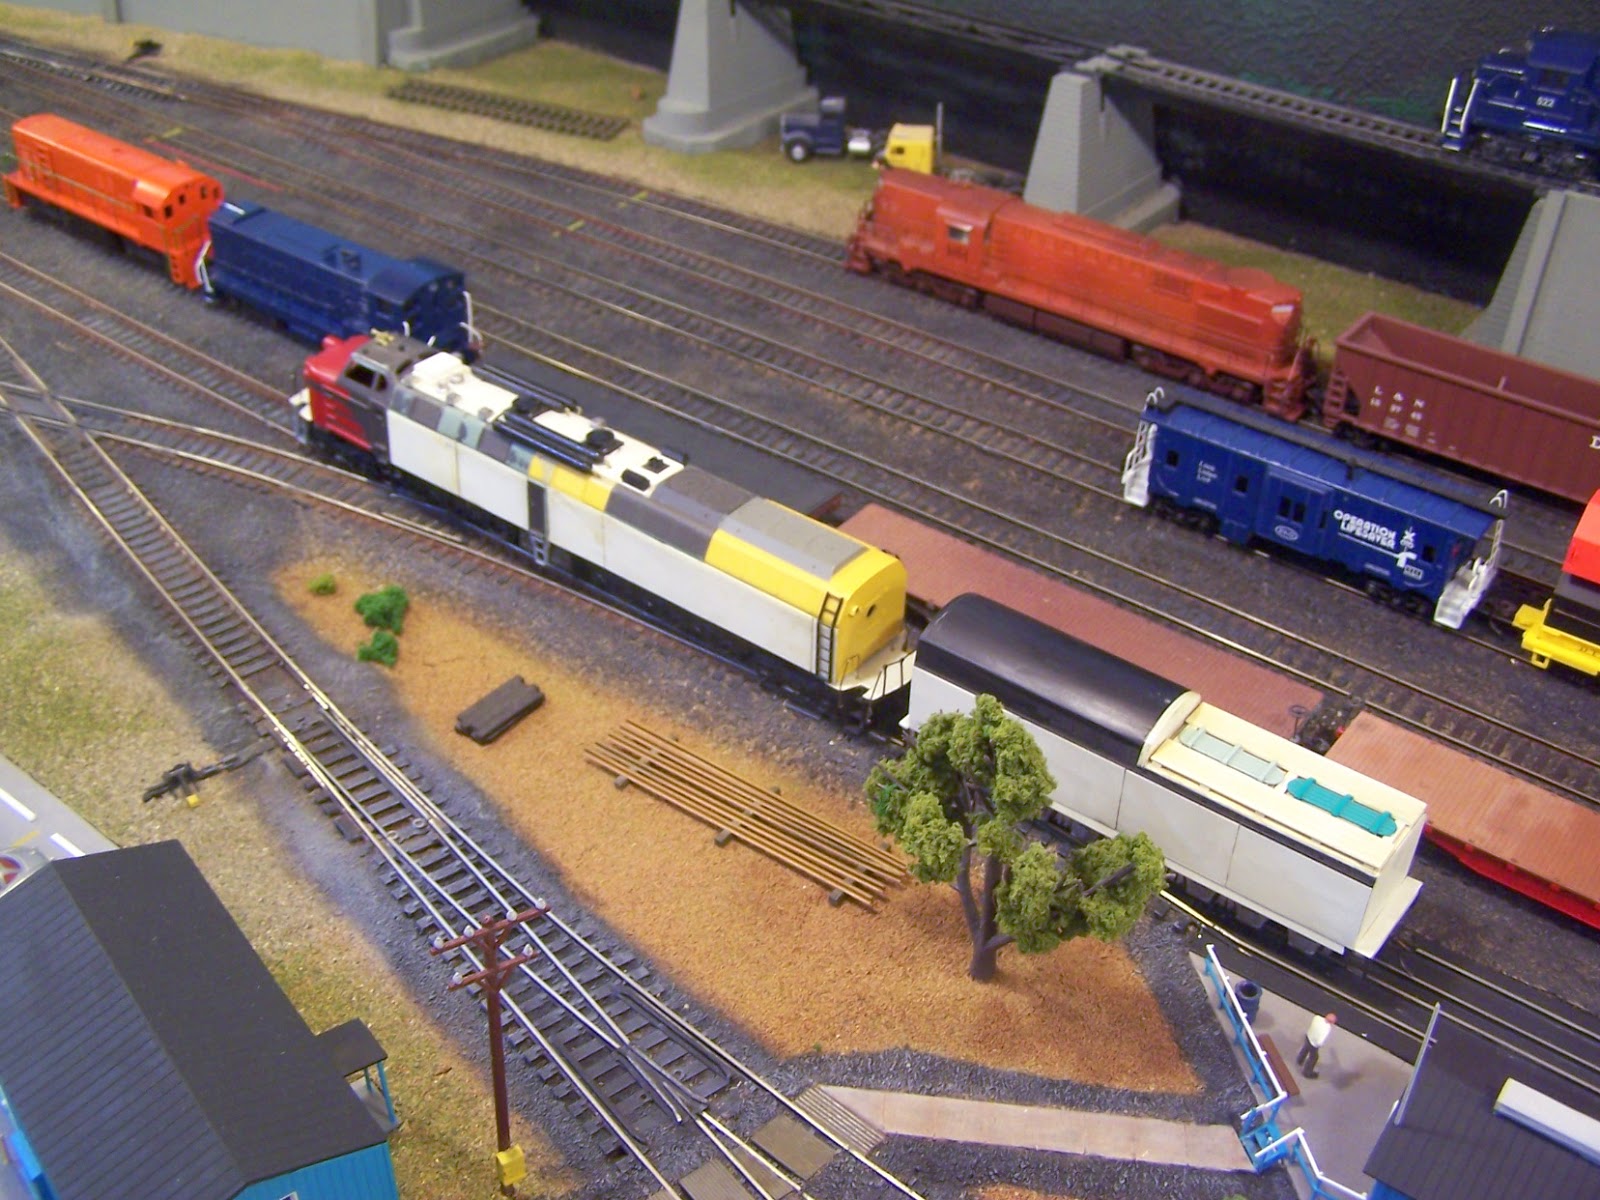
The locomotive and tender had been painted and ready for lettering. There has been a delay in lettering and while the wait the turbine is being put through a few test while sitting in the yard. As of right now, the locomotive has been a good success with a few minor issues that are being worked out.
KV&O RS11 #431 switching out a couple bad orders.
Saturday, March 7, 2015
ACE-G1-4000 Turbine Part 2
How the ACE-G1-4000 turbine come about. With the new way to power locomotives always on the drawing broad, companies all over the world are working on their ideals. The KV&O isn't a stranger in building locomotives. They have been rebuild locomotives since the late 70s at there shops at the Black Mountain Yards. The KV&O decided it would try there hand at building a turbine. The biggest decision to be made what kind of fuel they wanted to use. They looked at passed achievements and failures from other railroads. There was the Union Pacific Turbines that used Bunker C oil. Then The N&W, C&O, and also UP to test out steam turbine locomotives. The Bunker C oil turbines proved to be very reliable but with the cost of oil going up the KV&O decide on trying a steam turbine locomotive due to the main freight haul was coal and it was available at a moments notice.
The KV&O and GE discuses and came up with a plan. GE would come up with a engine and the KV&O would build the body and frame. With in a few month GE contacted KV&O with the plans for the engine and components and the KV&O started working on a frame and body. KV&O was well know for keeping there retired locomotives. They had a frame to a GG1 that had been rolled over during a derailment on the electrified division. The frame was still in good shape but the body was not repairable. The locomotive bed had been found. Purchased from a scrape dealer in California was a cab to a thought to been scraped Krauss-Maffei locomotive.
The frame was refurbished to the specs GE provided and the Krauss-Maffei cab was fitted to the frame. After a couple months GE delivered the engine and the locomotive started taking shape. The locomotive's body was build electric and piping ran and a tender was built.
The coal and water is loaded onto the tender but the coal is pulverized and mixed with a small amount of oil. it is then sent to the locomotive by connection pipes. There it heats the water to produce steam to turn the and turbine.
The next couple pictures are of the tender setting out side of the car shop and the nose of the locomotive (still in SP paint) sticking out of the paint shop waiting to get sand blasted.
The KV&O and GE discuses and came up with a plan. GE would come up with a engine and the KV&O would build the body and frame. With in a few month GE contacted KV&O with the plans for the engine and components and the KV&O started working on a frame and body. KV&O was well know for keeping there retired locomotives. They had a frame to a GG1 that had been rolled over during a derailment on the electrified division. The frame was still in good shape but the body was not repairable. The locomotive bed had been found. Purchased from a scrape dealer in California was a cab to a thought to been scraped Krauss-Maffei locomotive.
The frame was refurbished to the specs GE provided and the Krauss-Maffei cab was fitted to the frame. After a couple months GE delivered the engine and the locomotive started taking shape. The locomotive's body was build electric and piping ran and a tender was built.
The coal and water is loaded onto the tender but the coal is pulverized and mixed with a small amount of oil. it is then sent to the locomotive by connection pipes. There it heats the water to produce steam to turn the and turbine.
The next couple pictures are of the tender setting out side of the car shop and the nose of the locomotive (still in SP paint) sticking out of the paint shop waiting to get sand blasted.
ACE-G1-4000 Turbine Part 1
I'm always looking for odd and unique locomotives and rolling stock. While surfing on eBay a few weeks back I came across a very unique locomotive. After a few emails with the seller I found out the builder has passed away and he was selling the locomotive for the widow, and I ended up purchasing the locomotive. The locomotive was incomplete and still need some work, detail parts mostly. The front pilot had to be attached and the drive rods put back in place. The locomotives was built with parts from a Penn Line GG1 locomotive. The frame was scratch built out of brass tubing and plates, and the shell was built from 2 AHM Krauss-Maffei locomotive. One thing I really like about finding odd pieces of equipment I can make up store of how they came about. Wounder what I can come up with?
Monday, February 16, 2015
Adding Weight to ST&D cars.
If you have been modeling steel mills in HO scale, more than likely you have run across a few ST&D cars. Most of these do not include car weights, but that is a small problem. One could buy aftermarket weights and there is even a company that makes weights for the ST&D cars. For me, I go the cheap way out. I bought a bottle of Daisy BB's 2400 count and a bottle of Elmer's Multi-Purpose Glue. Total coming around $7.50
I put a thin layer of glue inside the car and then pour the BB's in the car a few at a time so they can be arranged so one can get a couple layers of BB's in the car. Once I get the first layer down I add another small amount of glue on top of these and then put another layer. I will let it dry for a few hours than with the cars still laying on its top. I will later glue the bottom of the car to hide the BB's. If you decide not to use the bottom to hide the BB's let the car lay on its top overnight to allow the glue time to dry.
With this package of BB's, I have done 5 ST&D Universal Mill cars and 1 Walther's Hot metal car that I forgot to put the weight in while I was building it. Less then half of the BB's have been used.
Heat cover for Tyco / Mantua culvert car. Part 1
Been working on this little project for a couple months. A heat cover that will fit on a Tyco/Mantua culvert car. Yes, I still use cheap cars on my layout. With a little tweaking, they run great and look heavy duty. First thing I did was remove the hook horn couples from the trucks and attached Kadee #5 to the car body, and work on the wheelsets to make them free rolling. Next, I started on the heat cover. I have seen different types so I didn't really model after any particulate one. When I first built the hood it was 1/4 inch higher and didn't look right. Once I cut it down I just used random details to help how the car looks.
Monday, January 26, 2015
Sylvan Ships Part 2
I finished the hull of the ore freighter and puttied in the seams of both freighters. The weather fared up enough for me to at least get one coat of paint on the ships. I'm really pleased with how the hull of the ocean freighter turned out. Next is starting the decks
After painting the ore freighter I seen a few areas that needs to be worked on. Over all it is coming along nicely. It is turning out better than what I thought it would. The deck cabins will be painted a dark yellow.
Monday, January 19, 2015
Sylvan Ships Part 1
Started working on a couple Sylvan resin ships. The ocean freighter has been going together pretty good but the ore freighter has been a different story. Been working on getting the main hulls to both ships done so I can paint them. I had the ocean freighter hull together in less than an hour but the ore freighter has been going on for over 6 hours and still have to finish it. Once I get there hulls done I will use putty to fill in a few cracks and then given them a good sanding and then off to the paint booth.
Ocean Freighter.
Ore Freighter
Ocean Freighter.
Ore Freighter
Subscribe to:
Posts (Atom)